Webmaster Tool Has Not Been Enabled

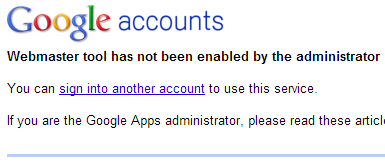
While configuring a new Google Apps account for a customer, I encountered the error below:

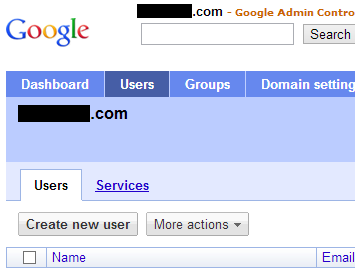
Here’s how to fix this. First, go to the Users tab, then click Services :

Type in Webmaster Tools in the search box directly under the Services tab:

Click the On button next to the Webmaster Tools label:

Remember to save your changes:

Retrieving The User’s IP Address

Retrieving the originating IP address of the request is simple in most languages.

Here’s how to retrieve the IP address in Java ( req represents a javax.servlet.http.HttpServletRequestreference ):

String ip = req.getRemoteAddr();

Here’s the same line in Go ( r represents http.Request ):

ip := r.RemoteAddr

In PHP, the originating IP can be retrieved from the predefined variable SERVER :

$_SERVER['REMOTE_ADDR']

Handling Form Data In Go

Here’s how to retrieve the value of a form element named comment ( r represents http.Request ):

comment := r.FormValue("comment")

Suppose the form value is an integer. Here’s how to extract the value from the request and convert it from a string to an integer (if an error occurs when converting, the value -1 is stored):

index, err := strconv.Atoi(r.FormValue("index"))    
if err != nil {
    index = -1
}

If needed, the submitted form value can be written to logging by calling:

c := appengine.NewContext(r)
c.Infof("Submitted Value: %v", index)

Templating In Go

The Go language contains an extremely powerful templating engine which simplifies the creation of web pages. Here’s a quick overview of how it works.

First of all, create a set of template HTML files. Wherever dynamic content should be added, add a {{.name-of-property}} annotation. Here’s an example:

<div class="row">
    <div class="span12">{{.propertyone}}</div>
    <div class="span8">{{.propertytwo}}</div>
</div>

In the above example, propertyone and propertytwo represent keys which will be replaced by values later on.

Next, make these template files available to the Go application. This line of code pulls in an entire folder of template files (assuming that templates is a root level directory):

var templates, templates_err = template.ParseGlob("templates/*")

Alternately, a set of templates can be called in by name:

var templates = template.Must(template.ParseFiles("templates/one.html", "templates/two.html", "templates/three.html"))

Using template.Must ensures that all the templates files are loaded in – if it is unable to find a named template file, template.Must sets off a panic.

Next, create a map of strings to display on the page. We associate the keys (which were set within the HTML of the template file) with values that will replace the annotations:

//This map holds the data to display on the page.
display_data := make(map[string]string)
display_data["propertyone"] = string_one
display_data["propertytwo"] = string_two
display_data["propertythree"] = string_three

Finally, execute the template. W represents a http.ResponseWriter reference to write the completed template to, one.html represents the name of the template to use, and display_data is the map that defines the values to use when replacing the annotations:

//Put the data into the template and send to the user.
templates.ExecuteTemplate(w, "one.html", display_data)

Remember to import the html/template package before using this code.
JSON, Javascript, and JSONP MIME Types

A quick note about MIME types: JSON responses have a MIME type of application/json while Javascript files use application/javascript . JSONP is a JSON object within a Javascript function call, so it shares the same MIME type as Javascript ( application/javascript ).

With that said, there are some browsers (largely older browsers) and applications that don’t understand the application/json MIME type. They may require JSON responses to have a content type of application/javascript , application/x-javascript , or text/html . If you encounter issues with handling JSON, it’s a good idea to try changing the MIME type – it may solve the problem.

As a reminder, here’s how to set the content type of a response in Java (other languages have similar functions):

resp.setContentType(mime_type);

The resp object represents a javax.servlet.http.HttpServletResponse reference.

Google Services Modifying Site Navigation

A quick note about some Google UI changes: Google is in the middle of removing the top black navigation bar.

Previously, Google had a top nav bar linking to various Google services:

Now that navigation bar is gone:

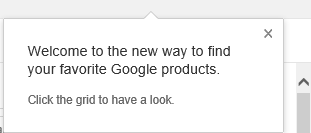
Google is popping up a little note to explain the changes:

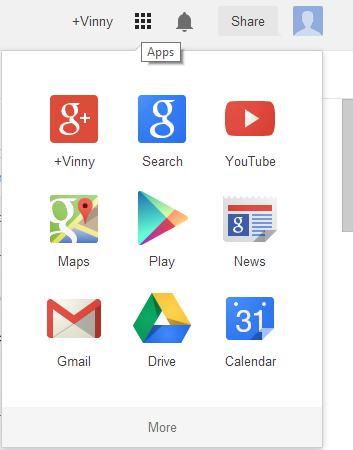
In short, the grid icon drops down a list of various Google services to choose from:

Returning Status Codes In Golang

Here’s an overview of how to send HTTP status codes in Go. W represents a http.ResponseWriterreference, and r is a http.Request reference.

The following line tells the browser to redirect to the URL given (a 301 is a Moved Permanently redirect):

http.Redirect(w, r, "http://learntogoogleit.com/", 301)

Here is a standard Not Found error:

http.Error(w, http.StatusText(404), 404)

An Internal Server Error is indicated using a 500 status code:

http.Error(w, http.StatusText(500), 500)

The above examples use StatusText to retrieve standard error text, but you can set your own text if needed:

http.Error(w, "Too Many Requests", 429)

Generating Callbacks For JSONP Code

Here’s a code snippet demonstrating how to wrap JSON text within a JSONP response.

The text of the JSON object is in the string json. The variable resp represents a HttpServletResponseobject. Callback represents contents of the HTTP parameter callback , which should be set with the name of the Javascript function to call. Before calling this code, it’s a good idea to validate that parameter.

String callback = req.getParameter("callback");
String json_text = callback + "(" + json + ");";
resp.getWriter().println(json_text);

Here’s an example of a simple JSONP response:

findIP({"ip": "8.8.8.8"});

This response will call the JS function findIP (the callback parameter contents), with an object containing the property ip (the JSON data).

Extracting Files From A Zip File

Here’s a code snippet demonstrating how to download a zip file and extract the files contained within.

The variable zip_url_string represents the URL to download the zip file from. To read in each file, put your code after the BufferedReader statement.

/**
 * Our first task is to grab the file, and open up a ZipInputStream to decompress the file.
 * A ZipEntry processes each entry within the ZipInputStream.
 */
URL url_addr = new URL(zip_url_string);
HttpURLConnection con = (HttpURLConnection)url_addr.openConnection();
InputStream fis = con.getInputStream();
ZipInputStream zis = new ZipInputStream(fis);
ZipEntry entry = zis.getNextEntry();
/**
 * We are going to loop through each ZipEntry until we get to a null entry (which 
 * represents the end of the ZipEntry list within the ZipInputStream).
 **/
while (entry != null) {
    //Collect the entry name. This is the filename, including any directory information.
    //Do any validation or processing needed.
    String entry_name = entry.getName().trim();
    //Create a BufferedReader to read in the contents of this file contained within the zip.
    InputStreamReader isr = new InputStreamReader(zis);
    BufferedReader reader = new BufferedReader(isr);
    /**
     * Do something here with the file. Use BufferedReader to read it in, then  
     * process it as necessary.
     */
    //Grab the next entry for processing
    entry = zis.getNextEntry();
}//end while loop going through ZipEntry entries

If the zip file being downloaded is especially large, you may want to add a longer timeout:

con.setConnectTimeout(milliseconds_to_wait);

Remember to add the appropriate import statements:

import java.net.URL;
import java.net.HttpURLConnection;
import java.io.InputStream;
import java.util.zip.*;

Removing EXIF Data With ImageMagick

Recently I needed to find a way to mass-remove EXIF data from multiple images. EXIF – if you didn’t know – is essentially metadata included within images. This metadata can include the name of the camera, the GPS coordinates where the picture was taken, comments, etc.

The easiest way is to remove EXIF data is to download ImageMagick and use the mogrify command line tool:

mogrify -strip /example/directory/*

ImageMagick can be run within a Compute Engine VM to make it available to a web application. Here’s the command to install ImageMagick:

sudo aptitude install imagemagick