Posting To Twitter

Many web applications need to connect to and integrate with Twitter. In Java, the best and most widely-used library is twitter4j. The following code snippet shows how to connect to Twitter and post a tweet.

Oauth_consumer_keyoauth_consumer_secretoauth_access_token, and oauth_access_token_secret are the Twitter OAuth authentication keys. You can generate those keys by going to Twitter’s developer site and creating an application plus access tokens. The string tweet_text is the text to post to Twitter. If any problems occur while posting to Twitter, a TwitterException will be thrown.

ConfigurationBuilder config = new ConfigurationBuilder();
config.setDebugEnabled(true);
config.setOAuthConsumerKey(oauth_consumer_key);
config.setOAuthConsumerSecret(oauth_consumer_secret);
config.setOAuthAccessToken(oauth_access_token);
config.setOAuthAccessTokenSecret(oauth_access_token_secret);
Twitter twitter = (new TwitterFactory(config.build())).getInstance();
try {
    //Post to Twitter.
    twitter.updateStatus(tweet_text);
}
catch (TwitterException e) {
    //error posting to Twitter
}
Simple Logging In Java

In most applications, it’s a good idea to use a robust logging framework such as java.util.logging.* or log4j. However, when you’re writing simpler App Engine applications there is an alternative: use System.out and System.err.

App Engine catches all output written to the standard output streams System.out/System.err and prints it into the application’s logs. So logging a message is as simple as writing one line of code:

System.out.println("This is an informational logging line.");

Use the System.err stream to log an error:

System.err.println("Exception: " + e.getMessage());

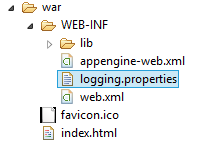
If you do decide to log informational messages, you also need to set the logging level to INFO. Open up the logging.properties file in the /war/WEB-INF/ directory:

Change the .level property to INFO:

.level = INFO

Now your App Engine application will record and display all logs sent to System.out and System.err.

Extract Subdomain From Request In Go

Here’s a code snippet that extracts the subdomain from an user’s request and places it as the first element in a new array.

R represents http.Request, and subdomain represents a new string array that has the extracted subdomain as its first and only element.

//The Host that the user queried.
host := r.URL.Host
host = strings.TrimSpace(host)
//Figure out if a subdomain exists in the host given.
host_parts := strings.Split(host, ".")
if len(host_parts) > 2 {
    //The subdomain exists, we store it as the first element 
    //in a new array
    subdomain := []string{host_parts[0]}
}

App Engine Default Server Error Page

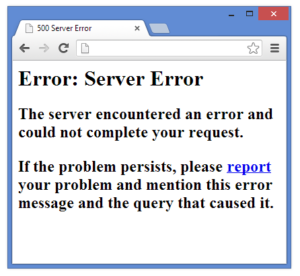
When your application encounters an error, App Engine will shut down the request causing the error and return the following text to the user:

Error: Server Error

The server encountered an error and could not complete your request.
If the problem persists, please report your problem and mention this error message and the query that caused it.

The server error page will look similar to the following:

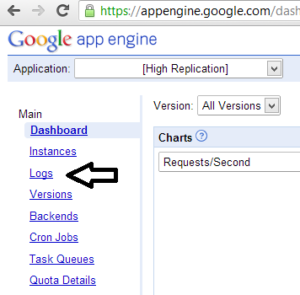
This error page is not the full error report; to see the actual error, you need to go to the Logs section of your App Engine application and find the error log. Here’s some pictures to help you find the error log:

First, go to your application dashboard and click the Logs link:

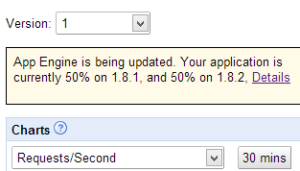
Click on the radio button marked Logs with minimum severity and choose Error from the dropdown box:

The logs page will automatically update to show all requests that failed.

Receiving Mail In Java

Receiving email is a bit harder than sending it. First, we need to inform App Engine that this application is allowed to receive mail. In the /war/WEB-INF/ directory there is a file marked appengine-web.xml. Write the below line into that file:

<inbound-services> <service>mail</service> </inbound-services>

Now we need to map a servlet to handle all of the incoming email. Go into web.xml (in the same directory) and put in the following lines:

<servlet>
    <servlet-name>ReceiveMail</servlet-name>
    <servlet-class>com.example.ReceiveMailServlet</servlet-class>
</servlet>
<servlet-mapping>
    <servlet-name>ReceiveMail</servlet-name>
    <url-pattern>/_ah/mail/*</url-pattern>
</servlet-mapping>

This informs App Engine that there is a servlet called com.example.ReceiveMailServlet (modify the name to match your code), and it is responsible for handling all incoming email (it handles all requests directed to /_ah/mail/ which is where App Engine sends the mail).

In the servlet handling the incoming email, paste this doPost() function:

public void doPost(HttpServletRequest req, HttpServletResponse resp) throws IOException {   

try {
    Properties prop = new Properties();
    Session session = Session.getDefaultInstance(prop, null); 
    //May throw a MessagingException if incoming message is malformed.
    MimeMessage message = new MimeMessage(session, req.getInputStream());
}
catch (MessagingException e) {
    System.out.println("This message was malformed. Stopping.");
}

}//end doPost

From here, we can retrieve the from address and the subject with a few lines:

String from = message.getFrom()[0].toString();//Get the first From address listed.
String subject = message.getSubject();

The content of the email can be extracted using the getContent() function of MimeMessage.

Google App Engine Source Code

App Engine maintains the source code repository for its’ APIs at https://code.google.com/p/googleappengine/source/checkout . Using a Subversion client you can check out and review the code – just follow the directions on the page.

If you would prefer to browse the code online, you can go to https://code.google.com/p/googleappengine/source/browse/ . Open up the folders on the left side navigation bar until you get to the file you’re looking for. Most of the time you’ll want the most recent source code available, so browse to the SVN > Trunk folder and go from there.

Need an open source implementation of the whole production server and its environment? Try AppScale, which is a Google-supported project allowing App Engine applications to run on other servers.

Transforming An Image Using The ImagesService

Here’s a short code example demonstrating how to transform images using the images service. This code example resizes an image to dimensions of 100×100, figures out the MIME type of the image, and prepares to write the image data into a write channel (good for writing to Cloud Storage or another storage service).

The image_content object represents a byte[] array containing image data. This code snippet then creates two objects: image_mime (the MIME type for the resized image) and buffer (a ByteBuffer containing the resized image’s data, ready for writing to a write channel).

// Create the image from the byte array
Image image = ImagesServiceFactory.makeImage(image_content);
// Resize the image to 100x100
Transform resize = ImagesServiceFactory.makeResize(100, 100);
ImagesService images = ImagesServiceFactory.getImagesService();
image = images.applyTransform(resize, image);
//Figure out the format of the image, and build a mime type.
Image.Format format = image.getFormat();
String image_mime = "image/" + format.toString().toLowerCase();
ByteBuffer buffer = ByteBuffer.wrap(image.getImageData());