Clearing Memcache

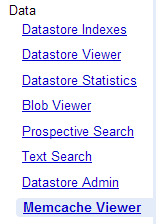
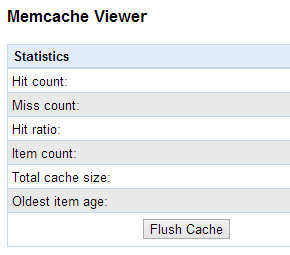
A quick note today: If you upload new data to the datastore via the bulk uploader or change your application’s data model, you should flush your application’s memcache to prevent stale data from being served to browsers. To do this, go to the Memcache Viewer screen (under the Data heading in the navigation bar) and press the button marked Flush Cache:

Looking Up App Engine Issues

Found a bug within App Engine? Want to request a feature? The best way to notify Google is to file an issue within App Engine’s tracker, located at: https://code.google.com/p/googleappengine/issues/list .

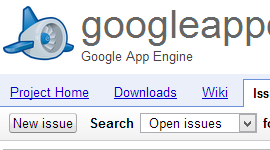
You can file an issue by clicking the New Issue button in the top left corner of the page:

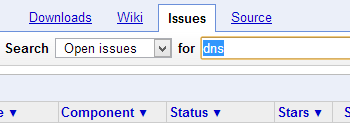
But before you file a new issue, make sure that someone else hasn’t already filed the same issue. You can search issues by using the search box on the upper portion of the page:

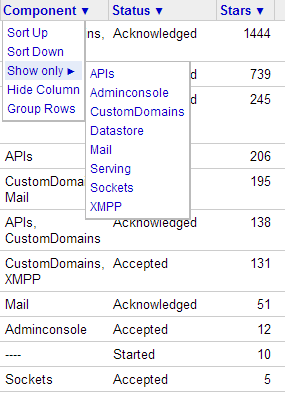
If you don’t want to search, you can browse through the issues by using the dropdown boxes in each header:

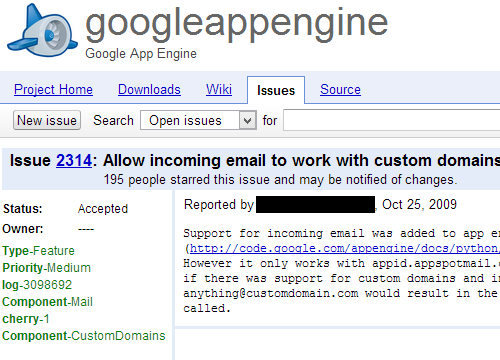
Here’s an example of what an issue looks like:

Retrieving All Entities Older Than An Arbitrary Date

Here’s a Java code example to search the datastore for all entities within a kind older than a given date.

The variable kind is the entity kind being searched, add_date is a property on each entity that is set to the date the entity was created, and entities is a java.util.List object containing the returned entities. The variable time_point represents a point in time; we query the datastore for all entities with a date less than that.

/**
 * Retrieve all entities older than a set amount of time.
 */
Query q = new Query(kind);
//Represents a point in time 48 hours ago.
Date time_point = new Date((new Date().getTime()) - (1000 * 60 * 60 * 48));
Query.Filter time_point_filter = new Query.FilterPredicate("add_date", Query.FilterOperator.LESS_THAN_OR_EQUAL, time_point);
q.setFilter(time_point_filter);
PreparedQuery pq = DatastoreServiceFactory.getDatastoreService().prepare(q);
List<Entity> entities = pq.asList(FetchOptions.Builder.withLimit(30));
System.out.println(entities.size() + " entities returned.");

Suppose you wanted to loop through all of the returned entities. Here’s an example:

//Loop through all entities
for (int i = 0; i < entities.size(); i++) {
    Entity entity = entities.get(i);
    System.out.println("Entity: " + entity.toString());
    //Do something with the entity variable.
}//end loop going through all entities

Hanging Memcache Calls

Recently there was a discussion in the App Engine forums about memcache calls that were hanging; in one instance, a memcache async put call was taking 2 hours to complete!

This was a particularly interesting issue, and I’d like to share a number of thoughts I had while solving it:

App Engine has a number of internal rate limiting/throttling controls on services. Moving large quantities of data around can quickly cause an application to hit these limits. In fact, I suspect that this was the actual problem – the original poster’s application was storing multiple megabytes of data into memcache in multiple asynchronous calls that occurred simultaneously; this design could easily be hitting a number of different rate limits. My suggestion for solving this problem (which ultimately worked) was to add a short delay after each memcache put call and to split the data amongst an increased number of memcache put calls. The reasons for which I suggested this fix are numerous:

  1. Adding a short delay after each memcache put call buys time for App Engine’s rate limit to reset; it prevents App Engine from thinking that the application is malfunctioning or attempting to overwhelm the memcache pipeline.
  2. Delays are easy to implement – in Python it’s one call to time.sleep(number of seconds to delay)and in Java it’s a simple call to Thread.sleep(number of seconds to delay). Note that in Java, you have to catch the potential InterruptedException. The Go call is similar to Python: call time.Sleep(delay duration). In PHP a delay is even simpler than in all of the above languages: all you need to do is call sleep(delay seconds).
  3. Increasing the number of memcache put calls means that a smaller amount of data is being stored for each memcache put. This contributes to point 1: preventing the pipeline to memcache from being overwhelmed with data.
  4. The delay doesn’t need to be long: two to five seconds is more than enough. In some cases, even a one second delay is enough to work.

Fortunately, the above fix worked in this case. But if it had not, I was prepared with a number of other possible fixes. For instance, I would have suggested the use of the task queue: split the data among multiple tasks, and then have each task store their data into memcache. Since each task would constitute a separate request and may be split amongst multiple instances, there’s less of a chance for any rate limiting to kick in. If that option wasn’t palatable for any reason, then another option would be to switch to dedicated memcache; it seems to be much more forgiving in regards to usage.

If none of the above options had worked, I would have suggested dumping memcache entirely and writing to the datastore/Cloud SQL. While memcache is a terrific service, it is not reliable – persisting the data through alternative sources is a much better way to manage large quantities of information.

The short version of this post: hanging or slow memcache calls can be fixed by inserting delays after each call and decreasing the amount of data handled in each memcache call.
Basic Java Task Queue Code

Here’s a simple example of how to use the task queue in Java. The code below retrieves the default queue and queues up a task. The task will request the /example_url path and pass in the parameter parameter1 with the value parameter1_value.

Queue queue = QueueFactory.getDefaultQueue();
TaskOptions task = TaskOptions.Builder.withUrl("/example_url");
task.param("parameter1", parameter1_value);
queue.add(task);

Remember to import the task queue classes:

import com.google.appengine.api.taskqueue.Queue;
import com.google.appengine.api.taskqueue.QueueFactory;
import com.google.appengine.api.taskqueue.TaskOptions;

Changing Front End Instance Classes

App Engine allocates a certain amount of RAM and processing power to your application. Specific sizes of memory and processing power are called instance classes. You can increase the amount of resources allocated to your app by moving to a higher instance class as shown below.

First, go to the administration console and click the Application Settings link:

Go down to the Performance section and find the dropdown box marked Frontend Instance Class.

Select the instance class you need. Note that selecting a higher instance class will cost you more money/deplete your free instance hours faster.

Save your settings by clicking the Save button.

X-Google-Cache-Control URL Fetch Response Header

Google caches the results of URL Fetch requests so subsequent requests can be supplied from the cache, thereby speeding up the request and your application in general.

This can be troublesome though, especially if an application is accessing a web page that changes quickly; URL fetch may be returning stale results without the application understanding this. Fortunately, there’s a way to detect whether or not the page was retrieved from a Google cache server.

For all URL Fetch requests from the production App Engine servers, the X-Google-Cache-Control header is added to URL Fetch responses. If the header has a value of remote-fetch, then the fetch retrieved a fresh copy of the page. If the value is remote-cache-hit, then the page was retrieved from Google’s cache and may have stale data.

Here’s how the header will look like if it’s a cache hit:

X-Google-Cache-Control: remote-cache-hit

While a freshly retrieved page will have this header:

X-Google-Cache-Control: remote-fetch

Missing User Agent For Development Server URL Fetches

A quick note: the App Engine development server doesn’t add an User-Agent header for URL fetch requests.

As I commented in a previous post, the App Engine production environment automatically sets an User-Agent (listed below) to all URL Fetch requests. If you set a custom user agent, App Engine will append the below text to your custom header.

AppEngine-Google; (+http://code.google.com/appengine; 
appid: YOUR_APPLICATION_ID_HERE)

However, the development server doesn’t add this header automatically. If you set a custom User-Agent header, that’s all that will be sent – no other identifying information. If you don’t set an user agent, URL fetches from the development server will not have any user agent information.

This can be an issue while developing applications in the dev server; some APIs require the existence of this header, and will refuse to respond or heavily rate limit requests if this header is missing. For instance, the NewsBlur API requires an user agent header for all requests. If the request doesn’t contain an user agent header, the API will refuse the request even if it’s authenticated.

Always set a custom user agent header which accurately describes your application to all URL fetch requests. If your application does a lot of URL fetches to the same API/server, it may be a good idea to list your email address or a web page with more information about your application.

Error Parsing YAML File: While Scanning A Simple Key

App Engine uses the app.yaml file to route incoming requests to the appropriate handlers. It’s important to write proper YAML code in this file, otherwise your application may behave erratically or not at all.

One common problem with YAML files is failing to properly separate key:value pairs. The YAML specification requires a colon ( : ) and one space character between the key and the associated value. Here’s an example of a properly formatted YAML key:value pair:

Key: Value

Now here’s an example of a broken app.yaml file:

application: an-example-application-id
version: 1
runtime: php
api_version: 1
threadsafe:true

Notice the error? The threadsafe property has a colon, but no space separating the key ( threadsafe) and the value ( true ). Here’s a screenshot of appcfg refusing to upload this broken file:

If you receive this error, make sure that all of your YAML properties are separated by a colon and a space. One space is enough, don’t use tabs or multiple spaces.