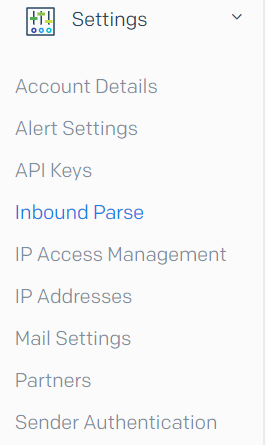
I was setting up a new application to use SendGrid’s inbound parse email function, so here’s some quick documentation. In the Sendgrid dashboard, go under Settings > Inbound Parse:
Then click on the top blue button: Add host & URL.

Fill in the screen that comes up with the proper domain, and subdomain (the subdomain is optional). The destination URL is where Sendgrid will POST the email to.

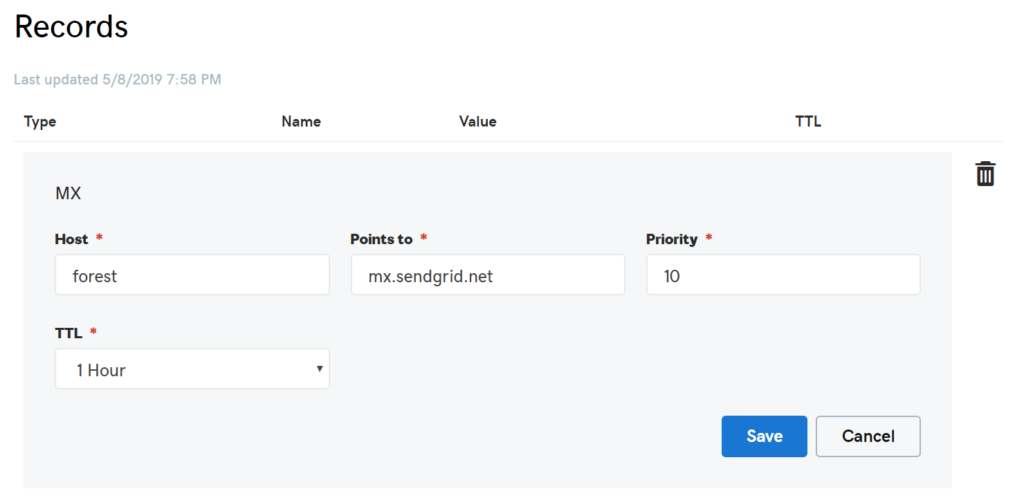
At the domain registrar, set up the proper MX record. Look up the appropriate documentation based on the registrar you use – this is how it looks like on GoDaddy:
In your application, set up a handler to answer the SendGrid request: in the screenshot example above, the handler was located at /inboundmailwebhook/. Any inbound mail gets POSTed as regular form data, which most frameworks can handle automatically.