Receiving Mail In Java

Receiving email is a bit harder than sending it. First, we need to inform App Engine that this application is allowed to receive mail. In the /war/WEB-INF/ directory there is a file marked appengine-web.xml. Write the below line into that file:

<inbound-services> <service>mail</service> </inbound-services>

Now we need to map a servlet to handle all of the incoming email. Go into web.xml (in the same directory) and put in the following lines:

<servlet>
    <servlet-name>ReceiveMail</servlet-name>
    <servlet-class>com.example.ReceiveMailServlet</servlet-class>
</servlet>
<servlet-mapping>
    <servlet-name>ReceiveMail</servlet-name>
    <url-pattern>/_ah/mail/*</url-pattern>
</servlet-mapping>

This informs App Engine that there is a servlet called com.example.ReceiveMailServlet (modify the name to match your code), and it is responsible for handling all incoming email (it handles all requests directed to /_ah/mail/ which is where App Engine sends the mail).

In the servlet handling the incoming email, paste this doPost() function:

public void doPost(HttpServletRequest req, HttpServletResponse resp) throws IOException {   

try {
    Properties prop = new Properties();
    Session session = Session.getDefaultInstance(prop, null); 
    //May throw a MessagingException if incoming message is malformed.
    MimeMessage message = new MimeMessage(session, req.getInputStream());
}
catch (MessagingException e) {
    System.out.println("This message was malformed. Stopping.");
}

}//end doPost

From here, we can retrieve the from address and the subject with a few lines:

String from = message.getFrom()[0].toString();//Get the first From address listed.
String subject = message.getSubject();

The content of the email can be extracted using the getContent() function of MimeMessage.
Retrieving An Array From Memcache In Golang

Here’s a short code example showing how to extract an array from memcache.

CustomStruct is the name of the struct the app uses, and “memcache_key” is the key that the memcache entry is stored under. C represents an appengine.Context reference. The array is extracted to the variable item_list which can then be manipulated and accessed using regular slice semantics.

//Declares the variable to unmarshal the 
//memcache item into. We need to declare 
//it first so the JSON unmarshaller 
//understands what to extract.
var item_list []CustomStruct
_, err = memcache.JSON.Get(c, "memcache_key", &item_list)
if err != nil {
    //Memcache failed to extract the list.
    c.Infof("Unable to retrieve list from Memcache: %v", err)
}

Google App Engine Source Code

App Engine maintains the source code repository for its’ APIs at https://code.google.com/p/googleappengine/source/checkout . Using a Subversion client you can check out and review the code – just follow the directions on the page.

If you would prefer to browse the code online, you can go to https://code.google.com/p/googleappengine/source/browse/ . Open up the folders on the left side navigation bar until you get to the file you’re looking for. Most of the time you’ll want the most recent source code available, so browse to the SVN > Trunk folder and go from there.

Need an open source implementation of the whole production server and its environment? Try AppScale, which is a Google-supported project allowing App Engine applications to run on other servers.

Transforming An Image Using The ImagesService

Here’s a short code example demonstrating how to transform images using the images service. This code example resizes an image to dimensions of 100×100, figures out the MIME type of the image, and prepares to write the image data into a write channel (good for writing to Cloud Storage or another storage service).

The image_content object represents a byte[] array containing image data. This code snippet then creates two objects: image_mime (the MIME type for the resized image) and buffer (a ByteBuffer containing the resized image’s data, ready for writing to a write channel).

// Create the image from the byte array
Image image = ImagesServiceFactory.makeImage(image_content);
// Resize the image to 100x100
Transform resize = ImagesServiceFactory.makeResize(100, 100);
ImagesService images = ImagesServiceFactory.getImagesService();
image = images.applyTransform(resize, image);
//Figure out the format of the image, and build a mime type.
Image.Format format = image.getFormat();
String image_mime = "image/" + format.toString().toLowerCase();
ByteBuffer buffer = ByteBuffer.wrap(image.getImageData());

A Simple Cron Declaration

Cron is a service to schedule tasks at predetermined intervals. For example, you could schedule a certain task to run every 10 minutes, or 10 hours, or every Monday. At every interval, App Engine will send a HTTP request to an URL that you specify.

Here’s an example of a cron file:

cron:
- description: Description Of Cron
  url: /url
  schedule: every 24 hours
  timezone: America/Chicago

This tells App Engine to run the script located at /url once every 24 hours. You can name other schedules, such as every 10 minutes, or every Monday 9:00 (run every Monday 9 AM).

Cron files are saved as cron.yaml in the root directory of a Go app, or in the /war/WEB-INF folder of a Java application.

Configuring EdgeCache – A Cache For App Engine

App Engine has a distributed caching system called EdgeCache which can be configured to quickly serve static or rarely-changed assets. To tell EdgeCache to cache your files, you need to set the following two headers:

Cache-Control: public, max-age=[time in seconds to cache]
Pragma: Public

The max-age argument takes the number of seconds to cache the given file. It must be set to at least 61 seconds.

Here’s example Java code to implement these headers. The max age is set to 86,400 seconds (1 day). The resp object represents a HttpServletResponse class:

resp.setHeader("Cache-Control", "public, max-age=86400");
resp.setHeader("Pragma", "Public");

Here’s the same code implemented in Go ( w represents http.ResponseWriter ):

w.Header().Set("Cache-Control", "public, max-age=86400")
w.Header().Set("Pragma", "Public")

Setting Permissions To Access Cloud Storage From App Engine

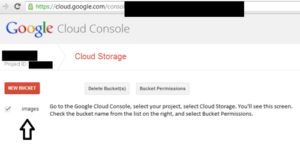
First, go to http://cloud.google.com/console and log in. Select your project and then click the Cloud Storage link. You’ll see the screen below:

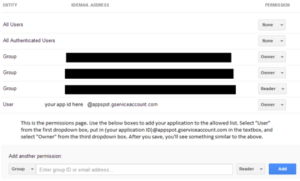
Check the checkboxes next to the Cloud Storage buckets you’re using, then press the button marked “Bucket Permissions”. You’ll see the following screen:

Add your App Engine application by setting the first drop down box to “User”, the textbox to “(your application id)@appspot.gserviceaccount.com”, and the second drop down box to “Owner”.

Creating Twitter Access Credentials

Integrating Twitter access to your application is fairly simple. But before you write a single line of code, you need OAuth access credentials to log into Twitter. Here’s how to get those credentials.

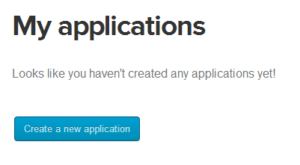
First, go to https://dev.twitter.com/apps. You’ll see the following screen:

Click on Create Application, then fill in the application details boxes in the next screen:

Scroll all the way down and click the button marked Create Application.

After that, go to the Settings tab of your new application:

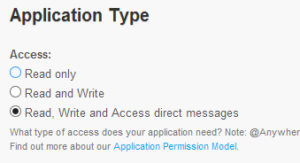
Go down to the Application Type section:

Click on the “Read, Write and Access direct messages” option, and save your settings.

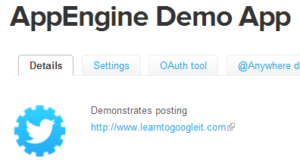
Go back to the details tab:

Scroll down and press the button marked “Create my access token”:

After a moment, you’ll see entries for the OAuth consumer key, consumer secret, access token, and access token secret (they’ll look like long strings of random characters). These tokens can be passed to twitter4j or another Twitter library to log into Twitter.